
Building your own gaming PC can be one of the most rewarding experiences, allowing you to tailor every aspect of your system to your needs. Whether you’re a seasoned gamer looking to upgrade or a beginner trying to get into PC building, this guide will take you through the process step-by-step. By the end, you’ll have a high-performance gaming machine that’s perfect for your needs—and your budget.
1. What You’ll Need
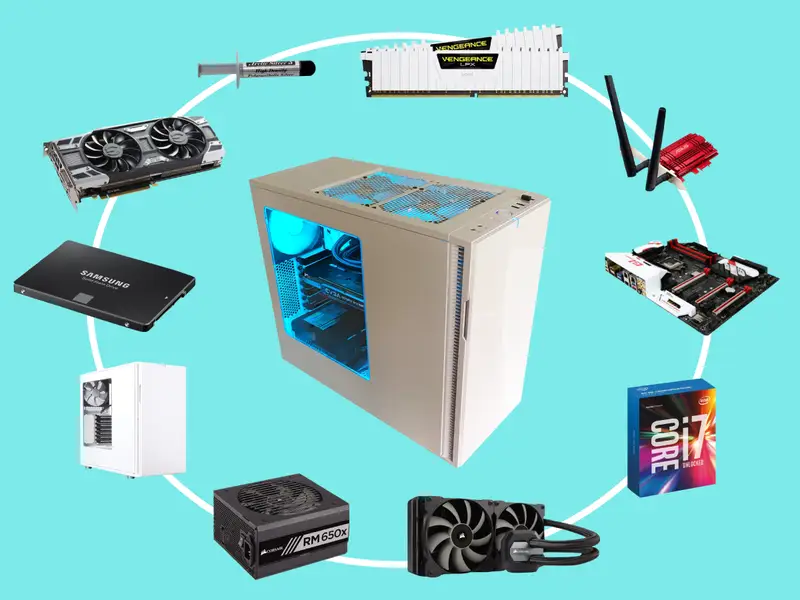
Before diving into the build, let’s cover the essential components you’ll need to gather. Each of these parts is crucial for a functioning gaming PC:
- CPU (Central Processing Unit): The heart of your PC, responsible for processing data.
- GPU (Graphics Processing Unit): The powerhouse for gaming, responsible for rendering graphics.
- Motherboard: The main circuit board that connects all components.
- RAM (Random Access Memory): Temporary memory for smooth multitasking and gaming performance.
- Storage (SSD/HDD): For saving your games, operating system, and other files.
- Power Supply (PSU): Powers your entire system.
- Case: The enclosure that houses all your components.
- Cooling System: Keeps your PC cool to prevent overheating.
- Operating System: Typically Windows, though Linux is also an option for some users.
Once you’ve gathered all the necessary parts, it’s time to start building.
2. Step-by-Step PC Build Guide
Step 1: Prepare Your Workspace
Find a clean, spacious workspace with enough room to lay out all your components. A static-free environment is essential, so consider using an anti-static wrist strap to avoid damaging any sensitive parts.
Step 2: Install the CPU
Start by installing the CPU onto the motherboard. Lift the lever or latch on the CPU socket, align the CPU with the socket (it only fits one way), and carefully place it into position. Once it’s seated properly, lock the lever back in place.
Step 3: Install the RAM
Insert the RAM sticks into the motherboard’s RAM slots. Make sure they’re aligned correctly—there’s usually a notch on the bottom of the RAM to ensure proper placement. Press down firmly until you hear a click to confirm they’re securely installed.
Step 4: Install the CPU Cooler
If you’re using an aftermarket cooler, install it on top of the CPU following the manufacturer’s instructions. If you’re using the stock cooler that came with your CPU, it typically attaches via clips or screws. Apply a small amount of thermal paste (if not pre-applied) to the top of the CPU before attaching the cooler for optimal heat transfer.
Step 5: Install the Motherboard into the Case
Now, it’s time to place the motherboard into your PC case. Align the motherboard’s mounting holes with the standoffs in the case and secure it with screws. Ensure that the I/O shield (the back panel for ports) is properly aligned with the motherboard ports.
Step 6: Install the GPU
Take your GPU and gently insert it into the PCIe slot on the motherboard. Secure the card with screws to the back of the case, ensuring it’s firmly in place. The GPU is the most critical component for gaming performance, so make sure it’s securely attached.
Step 7: Install Storage (SSD/HDD)
Mount your SSD or HDD into the appropriate bay in the case. If you’re installing an M.2 SSD, it’ll slot directly into the motherboard. For 2.5-inch or 3.5-inch drives, secure them in place using screws or tool-less mounts.
Step 8: Connect Power Supply (PSU)
Now, install the power supply (PSU) into the bottom or top compartment of your case, depending on your case design. Secure it with screws, then connect the power cables to the motherboard, GPU, and storage. Make sure everything is connected to the correct ports (e.g., 24-pin for motherboard, 8-pin for CPU, etc.).
Step 9: Connect the Front Panel and Cooling
Connect the front panel cables (power button, USB ports, etc.) to the motherboard. Refer to the motherboard manual for exact header connections. If you have additional case fans, connect them to the motherboard or power supply.
Step 10: Final Checks and Cable Management
Before closing up the case, double-check all connections. Ensure that the cables are organized and out of airflow paths for better cooling. Use cable ties or Velcro straps to keep everything neat.
Step 11: Boot and Install the Operating System
Once everything is connected and secured, turn on your PC. Enter the BIOS/UEFI by pressing a key (usually F2 or Delete) during startup. Here, you can check that all components are recognized. Next, install your preferred operating system, typically Windows, using a bootable USB drive.
3. Conclusion
Building your own gaming PC in 2025 can seem intimidating at first, but with the right components and a bit of patience, it’s a highly rewarding project. Not only will you get a customized machine that fits your needs, but you’ll also save money and gain valuable knowledge about how PCs work.
Remember to take your time during each step, follow instructions carefully, and always double-check your work. With your new gaming PC up and running, you’ll enjoy high-quality gaming experiences tailored to your exact preferences. Happy building!